Your cart is currently empty!
A Step-by-Step Guide to Building Your First Wood Table

Building your first wood table feels like a rite of passage for woodworkers. You've mastered basic cuts, maybe dabbled in a few small projects, and now you're ready to tackle something substantial. A table represents function meeting form, a piece that will serve your home for years while showcasing your growing skills.
Following a step-by-step guide to building your first wood table helps transform what might seem like an overwhelming project into manageable stages. Whether you’re crafting a dining table, coffee table, or workbench, understanding the fundamentals sets you up for success. Let’s walk through the process together.
Planning Your Table Design
Before touching a single board, sketch out your vision. How large will the table be? What style appeals to you: farmhouse, modern, rustic? Consider where the table will live and how it will be used.
Measure the space where your table will go. Leave adequate clearance around all sides. For dining tables, allow 36 inches of clearance for chairs and foot traffic. Coffee tables should sit about 18 inches from your sofa.
Choose dimensions that work with standard lumber sizes when possible. This approach minimizes waste and simplifies your shopping list. A table that's 36 inches wide and 72 inches long uses full boards efficiently.
Selecting Your Materials
When it comes to building a table, your wood choice is the headliner, the star, the main event!
Pro Tip: Look for S4S lumber (surfaced on all four sides) to save yourself some milling agony. And when you're at the lumberyard, play detective: hunt for straight boards with minimal knots and consistent color. A warped board can turn your DIY dream into a crooked nightmare!
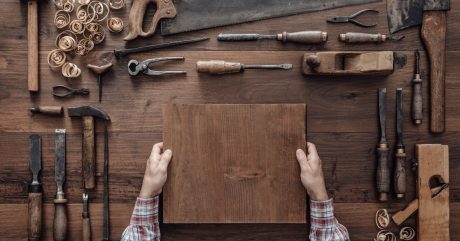
Gathering Your Tools and Hardware
Choosing the right wood for your project is like picking the perfect pair of shoes; it depends on the occasion, the budget, and just how fancy you want to get. Whether you're crafting a robust bookshelf or just dabbling in the art of birdhouse building, understanding the characteristics of different wood types can save you time, money, and a potential woodworking meltdown.
Essential power tools:
Hand tools you'll need:
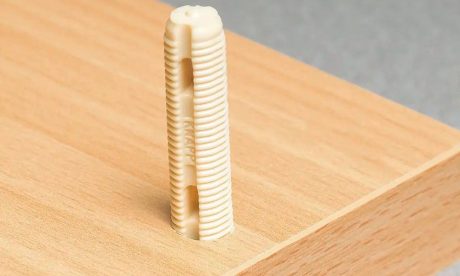
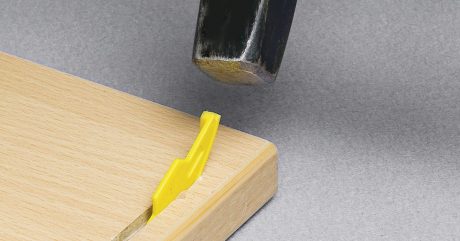
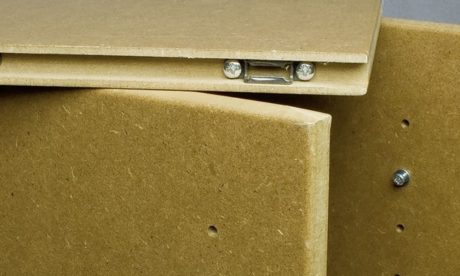
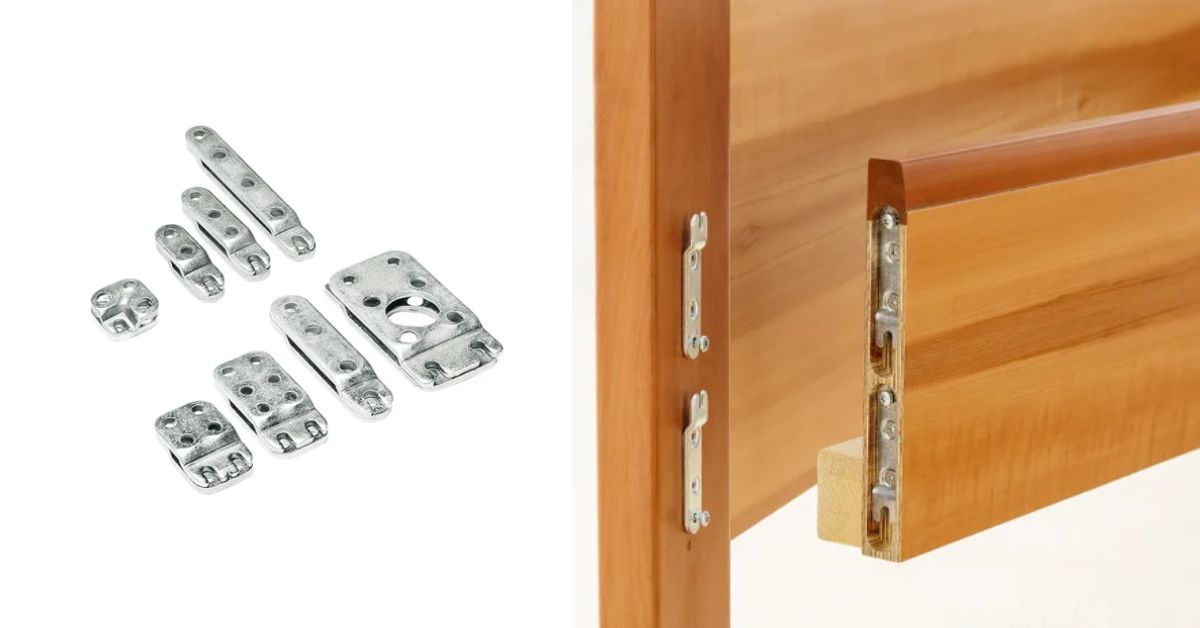
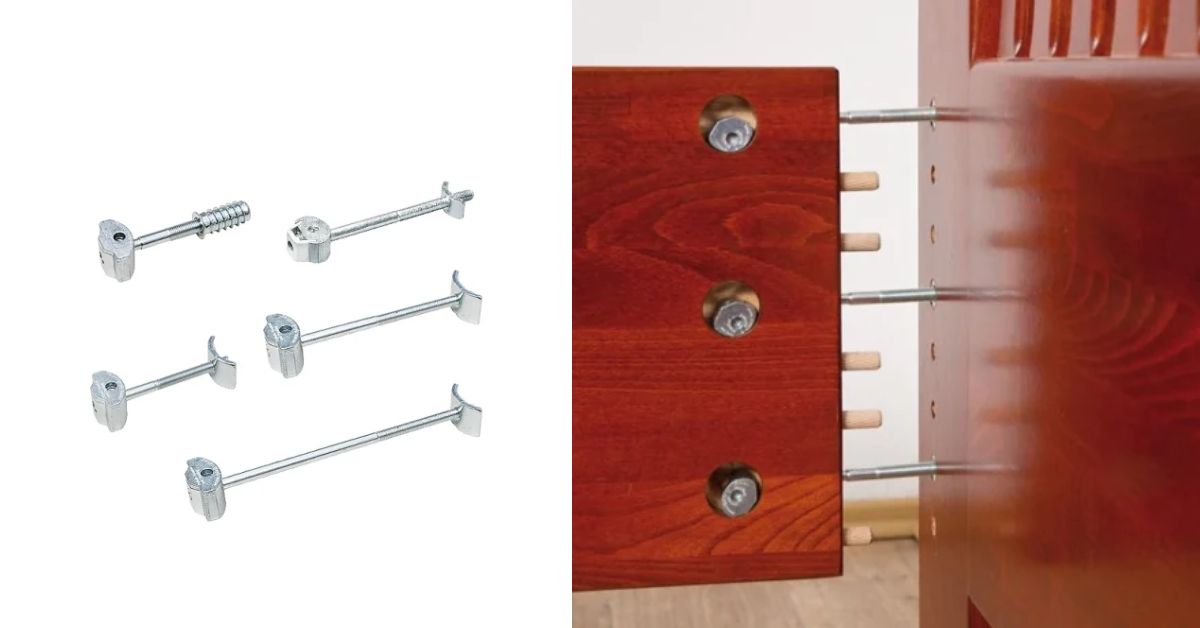
Beyond tools, select appropriate furniture fasteners for your joinery method. Modern hidden connectors provide strength without visible hardware, creating cleaner aesthetics than traditional methods.
Cutting and Preparing Components
Prepare your lumber by following your cut list carefully. Measure accurately twice before cutting once for precision. Group similar cuts to keep blade settings consistent.
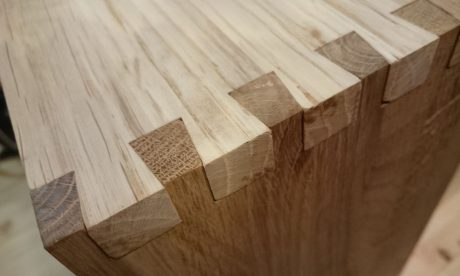
Begin by cutting your tabletop boards, choosing ones with matching grain patterns if making a solid wood top. To reduce cupping, alternate the growth ring direction of adjacent boards. Next, mill the apron pieces that connect the legs and provide support.
Cut them slightly longer, then trim to the final size after confirming squareness. Pay special attention to the leg blanks: cut all to the same length using a stop block on your miter saw, as even a 1/16-inch difference can be noticeable.
Before assembly, sand all parts with progressively finer grits (80, 120, 180, 220) to remove mill marks and ready surfaces for finishing.
Assembling the Table Frame
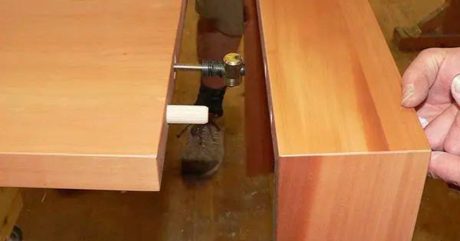
Building a proper frame is essential to prevent wobbling and ensure durability. Whether you use traditional mortise-and-tenon joints, dowels, or modern connectors, precision is key. Always dry-fit all parts first; this helps identify fitting issues before applying glue, which can make mistakes permanent. Make necessary adjustments, then disassemble for the actual assembly.
Work on a flat surface to avoid twisting when gluing. Apply wood glue to the joint surfaces, assemble the parts, and clamp them tightly. Verify the squareness by measuring the diagonals; they should agree within 1/16 inch. Allow the glue to fully cure before removing the clamps, as rushing this step weakens the joint.
Attaching the Tabletop
The tabletop needs a secure attachment that allows for seasonal wood movement. Solid wood expands and contracts across its width with changes in humidity. Rigid attachments can crack the top or pull apart joints.
Several attachment methods accommodate movement:
Position fasteners about 12 inches apart around the perimeter. Place them near corners first, then fill in the middle sections.
Finishing Your Table
Sand the assembled table with 180-grit paper, working with the grain. Remove all dust with a tack cloth before applying the finish.
Apply your chosen finish according to the manufacturer's directions. Most require multiple coats with light sanding between applications. Allow adequate drying time before use. Patience pays off with better durability.
Where to Go From Here
You've crafted your first table! This project honed your planning, material selection, precise cutting, and assembly skills, all of which are foundational for future builds. Each table will be quicker, and each outcome will be better as your expertise grows.
Reflect on your lessons: did joints fit, did the finish shine? Note successes and areas for improvement. Your next project might involve complex joinery or new wood species, but the fundamentals learned here remain your trusty workbench.
Looking for reliable connection methods for your woodworking? Modern furniture fasteners from KNAPP Connectors provide hidden strength for tables, beds, and case goods. Our innovative systems simplify assembly while delivering professional results.