Perfectly Align Two Pieces of Wood Using These Joining Tips

Joining two pieces of wood can feel like trying to get two toddlers to hold hands; they might seem aligned for a second, but the moment you turn your back, one has wandered off. Luckily for you, this guide will walk you through the top joining tips for perfectly aligning two pieces of wood. Forget wobbly joints and frustrating gaps; it’s time to create connections that are strong and stunning.
Step 1: Prepare Your Lumber Like a Pro
Before joining wood, you need pieces that are flat, square, and true. Keep in mind that a crooked foundation leads to weak joints. First, inspect lumber for defects like twists, bows, cups, or crowns. Next, check for rocking or light under boards placed on a flat surface. Once you identify imperfections, mill your lumber using a jointer and planer.
Face Jointing
Start by running one face of each board over the jointer to create a perfectly flat reference surface. Apply gentle, even pressure as you guide the board across the cutterhead. You may need several passes to achieve a completely flat face.
Edge Jointing
After creating a flat face, place that face against the jointer’s fence and run an adjacent edge over the blades. This guarantees you have one edge that is 90 degrees to your flat face. Now, you should have two perfectly milled reference surfaces.
Planing for Thickness
Take your board to the planer. Place the jointed face down, then run the board through to flatten the opposite face and bring it to a consistent thickness.
Ripping to Width
Finally, use a table saw to rip the board to its final width. Place the jointed edge against the rip fence so your final cut is parallel to it, resulting in a board with four square corners. Properly milled lumber is the secret ingredient to tight, gap-free joints. By taking the time to perform these steps correctly, you’ll avoid countless headaches down the road.

Step 2: Choose Your Joining Method Wisely
Once you’ve flattened the wood, it’s time to choose a joinery method based on your project, tools, and desired look. For edge-to-edge joints like tabletops, an edge-glued joint is usually strong enough, as long-grain glue-ups are incredibly durable. For right-angle or complex joints, reinforcement may be needed. Read along to learn about some of the most popular options.
Dowels
These small wooden pins add strength and alignment to a joint. You drill corresponding holes in each piece of wood, apply glue, insert the dowels, and clamp the pieces together. Doweling jigs make lining up the holes much easier.
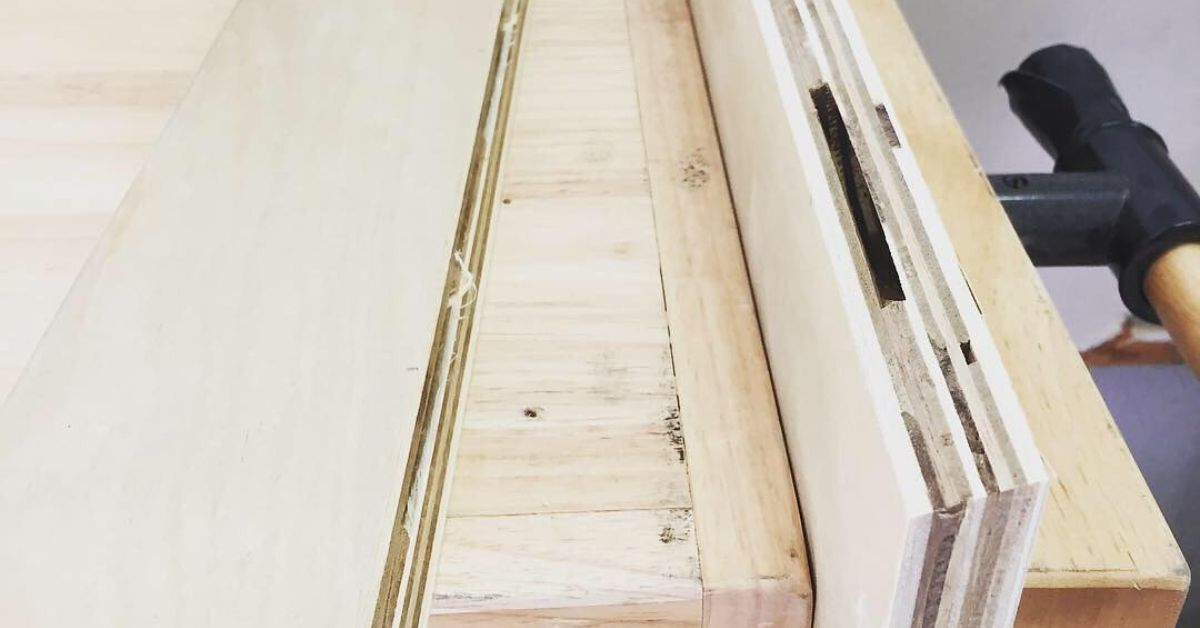
Biscuits
A biscuit joiner cuts a crescent-shaped slot into each piece of wood. To use, insert a compressed wood biscuit with some glue. The biscuit swells as it absorbs the glue’s moisture, creating a tight, secure fit that helps with alignment.
Pocket Holes
A pocket-hole jig allows you to drill a hole at a steep angle into one piece of wood so you can then drive a screw through it and into the second piece. This method is fast, strong, and great for building face frames, cabinetry, and other utility projects where the holes can be hidden.
Mortise and Tenon
This classic joint involves cutting a square or rectangular hole (the mortise) into a single piece and a corresponding pin (the tenon) on the end of the other. In the entire field of woodworking, this is one of the strongest and most respected joints.
However, you must take the time to consider your project’s demands before using a mortise-and-tenon joint. A simple picture frame might only need mitered corners with a touch of glue, while a load-bearing chair leg will demand the strength of a mortise and tenon.
Step 3: Mark and Measure With Surgical Precision
Woodworking is a game of millimeters; an error of just 1/16th of an inch can cascade into a noticeable gap or a wobbly structure. Your marking and measuring tools are your instruments for achieving perfection, so treat them with respect. To achieve surgical precision, remember the following advice.
Use the Right Tools
Always use a high-quality measuring tape, a combination square, and a sharp marking knife or pencil. A marking knife severs the wood fibers, creating a precise line that a chisel or saw blade can follow. Plus, it prevents grain tear-out when you make your cut.
Marking for Joints
When marking for joints, follow the “measure twice, cut once” mantra. Better yet, try to avoid measuring altogether when possible. For instance, when marking for dowel holes, clamp the two pieces together and use a doweling jig that references both boards simultaneously. When laying out dovetails, transfer the shape of the tails directly onto the pin board.
Consistent Referencing
Always measure from the same face or edge, preferably one of the reference surfaces you created during the milling process. This practice means that any minor imperfections in the wood don’t compound and throw off your alignment.
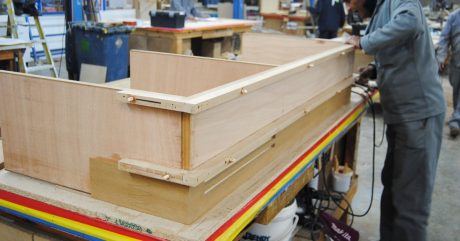
Step 4: Execute the Dry Fit and Glue-Up
Before gluing, always do a dry fit to make sure everything aligns perfectly. If there’s an issue, adjust now; it’s much easier than fixing mistakes after gluing. Once you’ve got the fit perfect, prepare your materials and get ready for the glue-up.
Prepare Your Clamps
Open your clamps to the approximate width you’ll need, making sure you have enough to apply even pressure across the entire joint. For edge-glued panels, you’ll want clamps spaced every 12 to 18 inches.
Apply the Glue
Using a high-quality wood glue, apply a thin, even layer to all mating surfaces of the joint. You want just enough to see a small, consistent bead of adhesive squeeze out when you apply pressure. Too little glue will create a weak bond; too much will make a cleanup nightmare.
Clamp It Up
Bring the pieces together and apply clamping pressure. Tighten the clamps until the joint is snug and you see that nice, even squeeze-out. However, be careful not to overtighten, as this can squeeze out too much glue and starve the joint, weakening it.
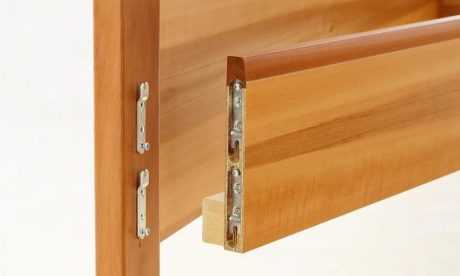
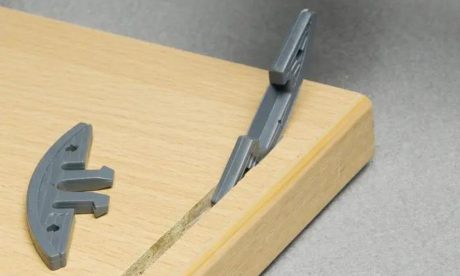
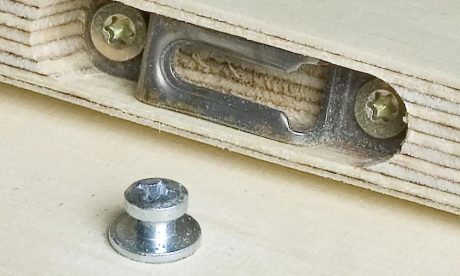
Check for squareness with your combination square as you tighten. Also, if your project allows for it, you can use wood connector hardware to add structural reinforcement while simplifying assembly.
Clean Up
Use a damp rag or a plastic scraper to remove the excess glue squeeze-out before it dries. It’s much easier to remove wet glue than hardened glue. When you’re done, let the glue cure for the time recommended by the manufacturer, typically at least a few hours before you remove the clamps. Wait a full 24 hours before putting any stress on the joint.
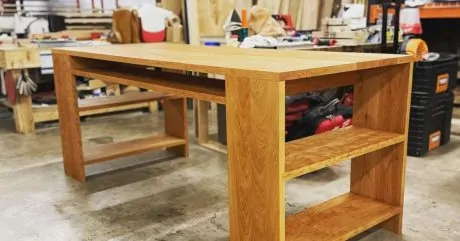
Your Path to Perfect Joints
Achieving a perfect union between two pieces of wood is a satisfying accomplishment that elevates the quality and durability of your work. By following these joining tips to perfectly align two pieces of wood, you can create a strong, seamless, and professional result.
Are you ready to take your woodworking projects to the next level? Visit the Knapp Connector website today and stock up on all the tools and supplies you need for smooth, sturdy, and professional results.